Ken's Sandbox
Asset Creation Evolved…Tool : Cabin Gen v0.1
Lastly the architecture can be stylized for art direction reasons so walls and corners are not confined to perfect 90 degree angles. Roofs can dip etc while remaining in a fully procedural non-destructive system. This is still a work in progress. There are some minor roofing scenarios that could generate better results as well as the missing connection piece for roof corners.
Tool : Tree Planter v0.1
Multiple tree types, rocks and grasses are fed into a probability matrix that allows the user to intimately control the composition of each growth type. This could possibly be used for changing seasons over time, or for performance gains by increasing the occurrence of cheaper trees. Trees are treated as bundles, so they have their sort of biome of rocks and grass. They also claim their own space so you will not see grass growing through rocks, or trees growing on rocks. Further to that obstruction objects can be designated which the trees, rocks and grass will grow around and accommodate.
This tool is not meant to populate an entire level with one large curve, it instead is far more powerful when used to create many smaller tree clusters that can be directed in the location of the trees, the shape of the cluster, the composition of trees and coverage.
A cheap and responsive, yet visually rich preview mode allows an artist to work at very interactive speeds.
Tool : Skull Fitter v0.1, Houdini + OpenCV
A pet project of mine for a while has been the idea of a 3d DCC having some sense of the data it is working on. It seems like the program knowing that you are working with a car, or a quadruped or in this case a human head would allow the software to make smarted context valid automations. This is a very early iteration of the tool. First using openCV I identify the face, eyes, nose and mouth of the 3d model. This then allows more landmarks to be placed and validated on the mesh. A skull mesh is then placed, aligned, and scaled to fit within the volume of the head. Various anatomical skin depths are then taken into account over the head so that the skull is a reasonable distance from the surface at all locations.
The registration could still be better and will be refined further. The next phase is building viens and placing facial muscles and tendons between the skull and skin surface that again adapt to the scan it is fed.
Deep Learning Part 2
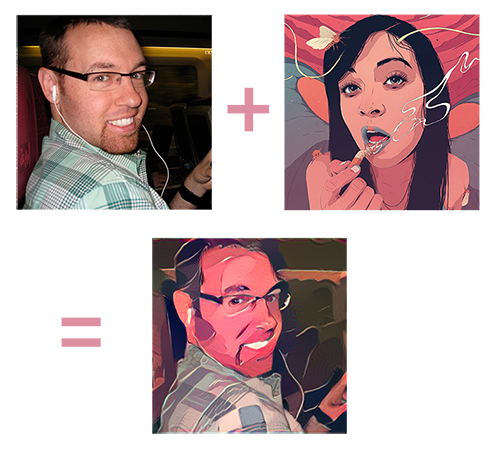
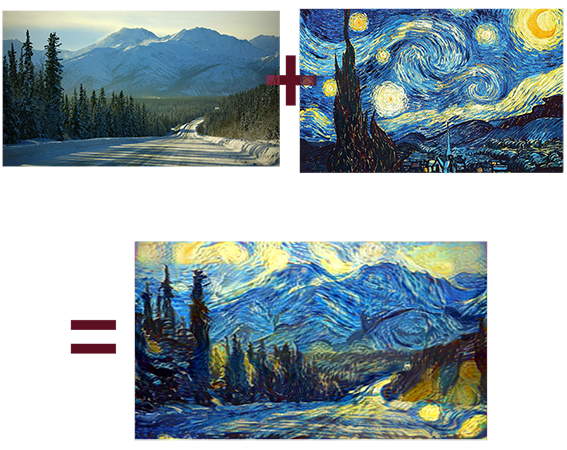
Here is another batch with the old pink image reworked for comparison. Not much difference but far quicker result. In general more style input images seem to be successful in producing satisfactory results basically meaning higher success rate.
Playing in the Deep Learning Sandbox
I believe the Kaggle world record is around 97% accuracy at identifying which class an image belongs to over a 10,000 image long test. Humans score about 94% accuracy at identifying each class an image belongs to. I was quite happy with the 93.20% accuracy I eventually got tuning my CNN and playing with different configurations and layer depths. It was a very interesting process to experiment with tuning models to learn very quickly but top out at say 80% accuracy, and make models that learned far slower and took much longer to train but could break 90% accuracy.

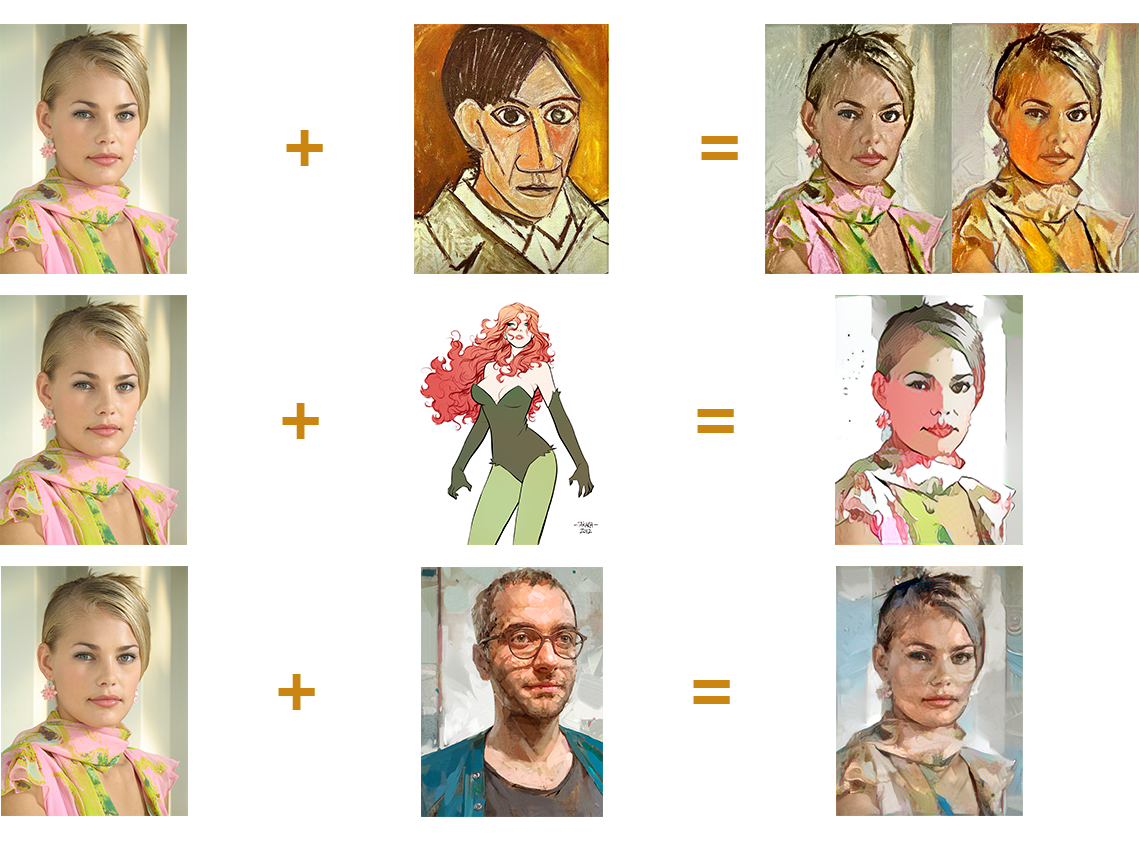
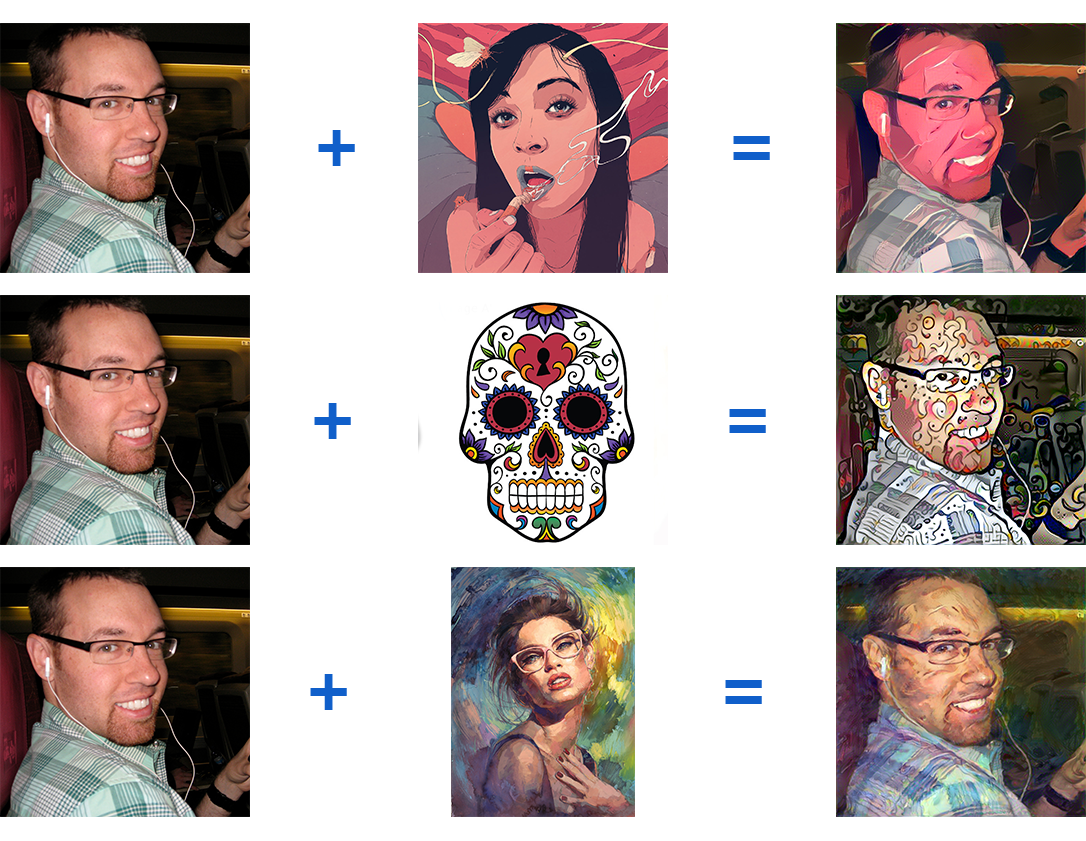
My real interest in Machine Learning is how it can be applied to visual problems, and tools that learn from the user. Perhaps one day anticipating what the user wants to do. When the paper "A Neural Algorithm of Artistic Style" came out I was very interested in the possibilities of quantifying an artistic style. Moving my training from the CPU to the GPU with Theano, CUDA 5.1 and a GTX 1060, and a snippet of the VGG16 dataset I hacked together my own version of the very popular "Prisma" app running on my old Dell. The neatest thing about what I had was that the code could take in any style image I gave it and attempt to transfer it. With the Prisma app you are locked into to a small pre-trained set of styles of their choosing. I need to get back to this area as I have seen improvements on the web that I would love to incorporate for better more consistent results than what I was getting last summer. The two initial uses I had for this technology was to learn our concept artists style and be able to transfer it to images from the web, generating my own concept art without the wait. He is a busy guy. The secondly use was for Look Dev. My idea here was to take an art style we liked, and a "White box" version of a level and envision what a game world might look like in a few seconds in that style instead of having artists spend days potentially "arting-up" a level. This seemed like a very good cheap litmus test to see if a style was worth further investigation.
For my future ML work, beyond making my Prisma hack more robust, I hope to explore the "enhancement" algorithms that are starting to pop up that have been used to upres textures and explore applying style transfer to textures, and then dealing with the caveats of UV islands and tiling. I have seen companies like Artomatix having similar ideas which is exciting and validating to see.
Tool : Component-Based Synthesis
I ended up looking into the area of machine learning as a result of this project. I think ML has huge potential in the creation of intelligent tools and content generation. Procedural content is great but often lends itself to only certain types of assets and complexities before hitting diminishing returns. It also often lacks the aesthetics of handmade assets. To me the holy grail of content generation is to enable a group of skilled artists to establish a style and a very high quality baseline that is then able to be replicated and expanded beyond what that team could otherwise produce without the sacrifice of quality or artistic control. I feel that expanding upon human loved assets is the way to do this. Therefore learning from existing content seems crucial.
I learned quite a lot from this project. One valuable lesson was to not always look for a solution that works 100% of the time. There may not be one. Instead consider multiple approaches and develop a process to measure and choose the best solution given the circumstance. Another concept that was new to me was the phenomenon of “overfitting” a problem. There was a lot of ML methodology I could relate to, and though I always strive to make the most robust tools I can, using the most generalized methods I can. It was enlightening to take a step back and realize that a solution that works 80% of the time on whatever you throw at it may be better than a solution that works 100% of the time, but only on a certain dataset. Overfitting is a constant struggle and one that I think is very case by case based on the overall goal of the tool and its application. I think borrowing methods from data scientists has enhanced my own process and approach to tool construction. Holding back data to test the tool and debug with came from these readings.
Building a tool like this I had to develop a method to mine data from all over an asset, and also to compare between assets to establish what are the limits of plausibility. And from there to allow the end user to override and even dictate theses bounds. All this data though often became a luxury to make decisions with. There is a lot of logic built into the tool. From simply counting how many axels a mesh has, to knowing to remove a trailer hitch when there is cargo present. Often a components position relative to another needed to be considered, and would dictate one path or another, or simply if a transform needed to be positive or negative.
An area that was always challenging was the mating of parts that did not naturally fit together. Developing a system to measure the quality of fit between two components took multiple approaches before a robust one was found. This was crucial for choosing which method of fit was best for a particular combination of pieces. Traditional collision detection was slow, and requires small time steps to be robust. Clipping, conforming the ends, or perhaps even filling in the gap may be a more performant approach.
The tool could be optimized far more than it is. Complete asset construction takes on average about 10 seconds, with minor changes taking about 1-2 seconds. Based on crude testing you could generate about 1000 assets in just over 2 hrs on one CPU. This is also with meshes that are generally in the 200-300K faces range. I would expect near real-time results with lower resolution assets. The system can also be expanded without too much effort. Adding additional seed meshes is about a 10 minute process, where a handful of expressions would need their bounds expanded to consider the new data. The real work is incorporating the new assets into realistic sizing which could likely be done via python dynamically spawning or perhaps even removing node branches in sync with the number of seed meshes. The system could also generate more variations per seed if it became more granular. For example allowing tires, wheel covers, or the cab region to be mixed and matched instead of remaining sub-components of larger sections.
Going forward I plan to investigate light fields, as a means to potentially score an assets visual uniqueness next to its peers. I think a lot of useful feedback and direction given by the user to the tool could result. This project was great, but is also a potentially bottomless pit of refinement. I am ready to move on and tackle the backlog of ideas I have on hold.
Tool : Helmet Tool WIP
Going forward the goals will be adding UV’s, adding Substance based textures that adapt to changes. And of course butting this in engine. Cables that intelligently adjust to the surface. Currently this is just a glimpse.
Tool : Adaptive UV's
Tool : Concept to Proxymesh v0.1
Tool : Armature Builder v0.1
Tool : Panel Generator v0.1
Tool : Fibermesh to Game Hair v0.1
I created my own “polygon-based” creep SOP in order to have the crown object ride the meshes it is used on. My creep sop can use either UV’s (which the tool generates for itself) or a Raycast based method to stick and travel along the mesh.
I have a lot of additional features in mind for this tool. Version 0.2 will likely be based out of H14 (waiting for more stable builds) and will feature some non-destructive hair grooming and creation tools as well as the ability to transfer hair to other meshes. I also hope to be able to expand the users ability to edit hair cards by region.
Tool : Attribute assignment v0.1
Version 0.2 will do a better job of aligning meshes. I have done some part recognition for other tools to find the head region on a mesh or the barrel of a gun. I would try and then use this information to align individual regions and deal with orientation differences.
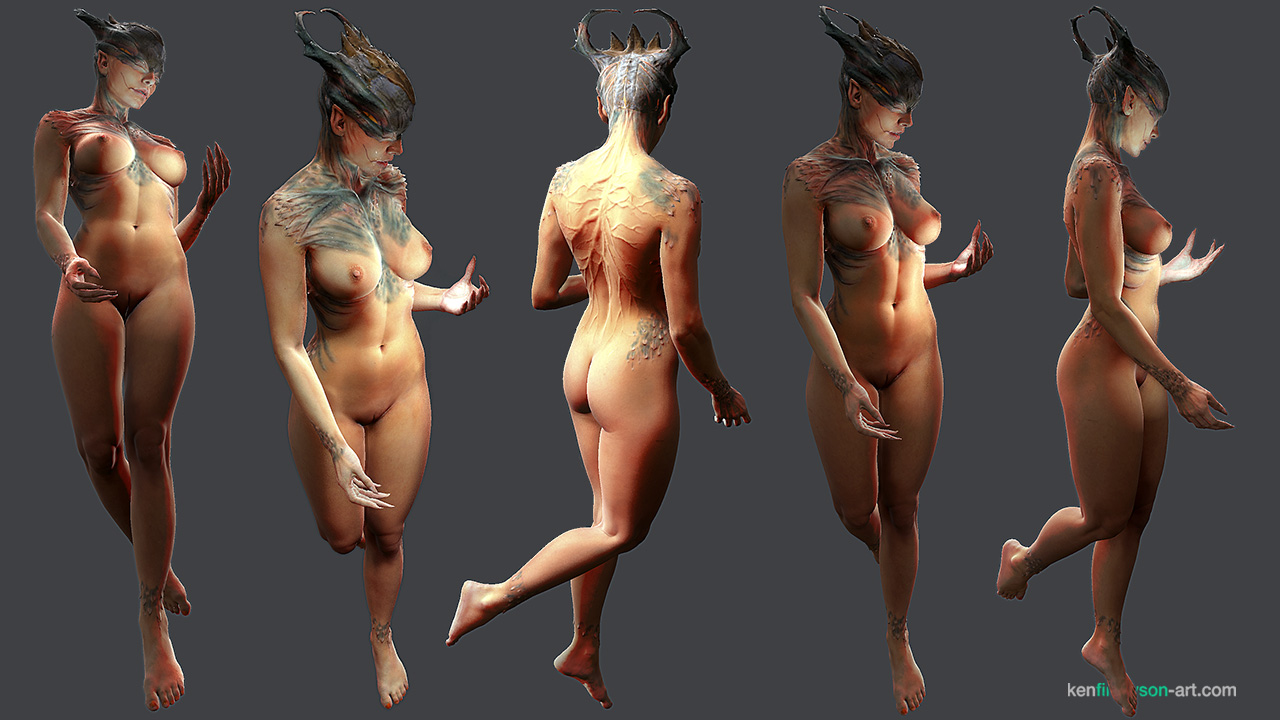
Scale Girl
This was also my first real foray into UDIM’s. I initially started the project in PTEX but found performance and workflow a bit smoother when I baked (using the awesome transfer tools in Mari) my PTEX textures into UV shells. Once you grasp the idea of setting up channels in Mari as your individual texture outputs you can create a very non-destructive iterative workflow. I was able to setup all of my numerous SSS related maps in Mari and then just use adjustment layers to dial in the contrast and saturation amounts to get the render I wanted in Modo.
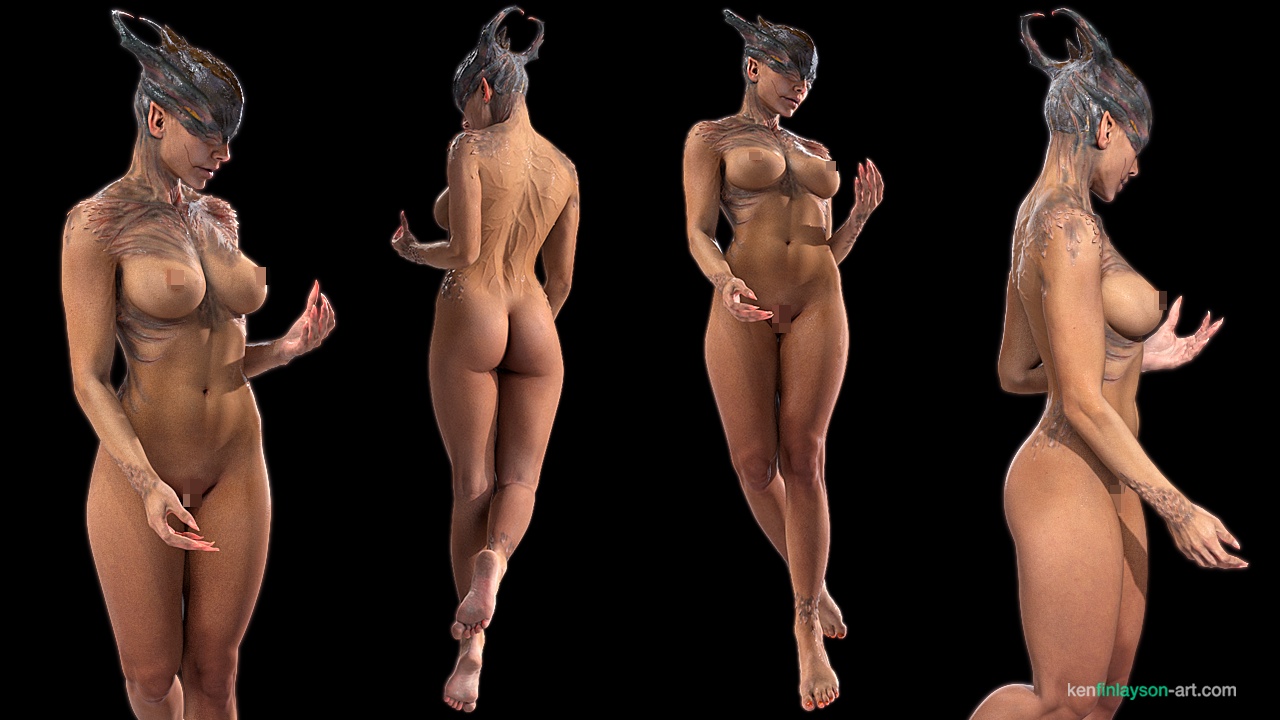
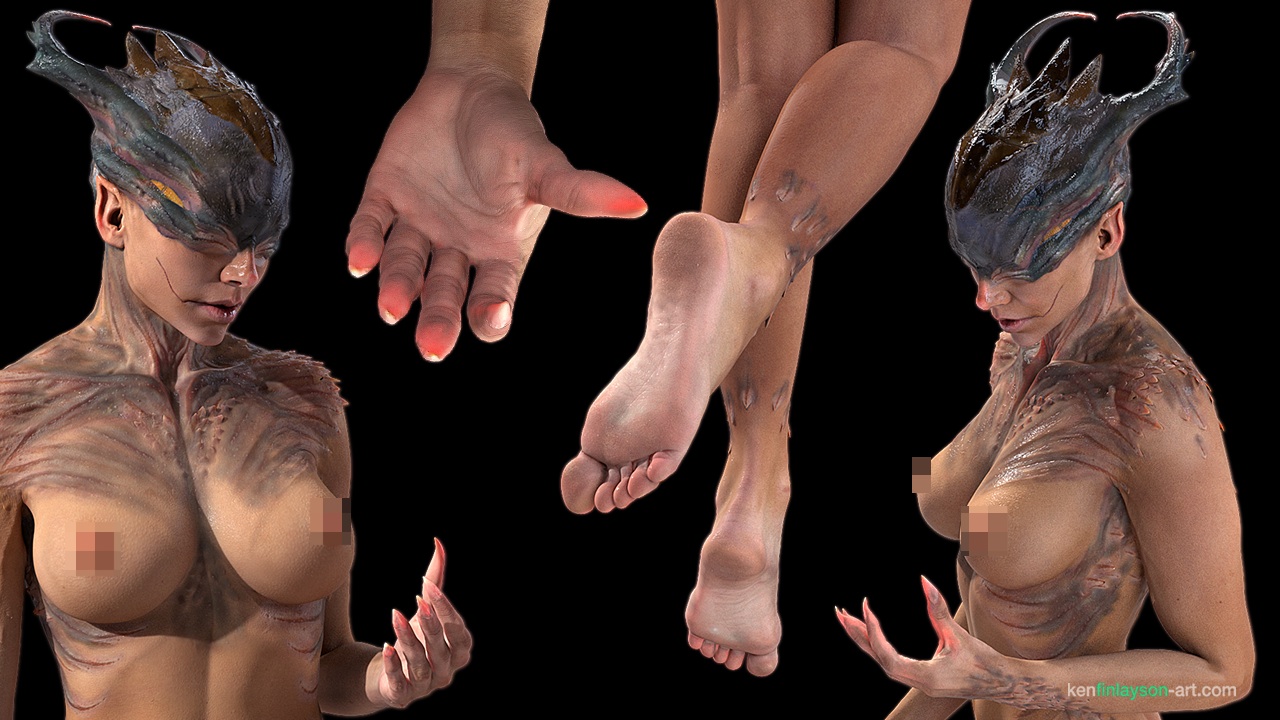
The final image is a real-time version of the asset rendered in Marmoset Toolbag. The textures were consolidated into 0-1 space using Mari’s texture transfer tools. The triangle count is 1/100th, and the texel space is 1/8th that of the images above.
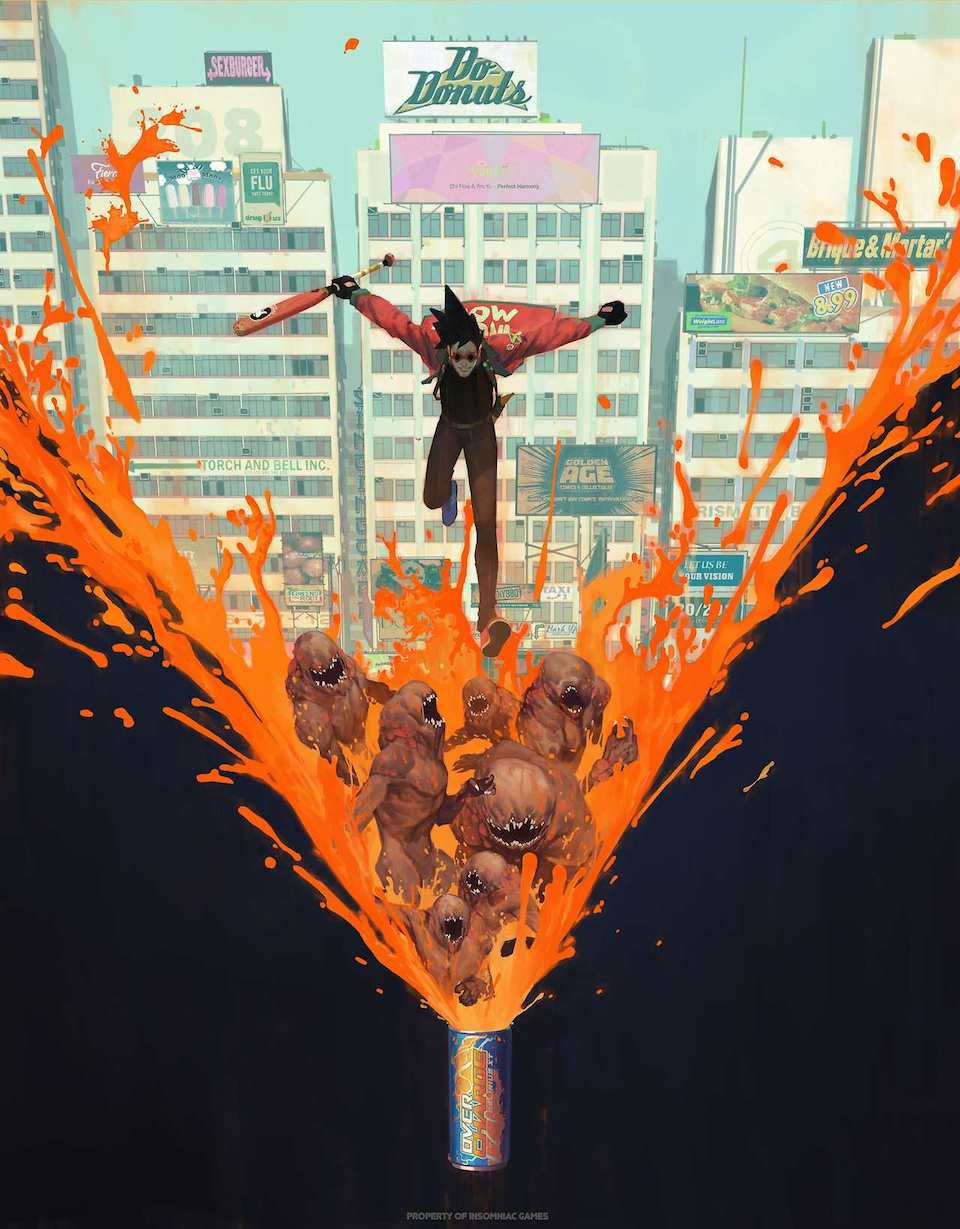
Sunset Overdrive is Out!
Sunset Overdrive is out!
I worked on this game from the very beginning, through all of its twists, turns, and re-boots. I learned a lot on the project. It forced a lot of painful, but positive growth at the studio, as this was by far the largest project the studio had ever taken on. Early on we had aggressive goals for number of characters on screen and the size and detail of the world. This forced us to consider new ways of working.
I did a lot of R&D on this project in several areas, from level creation to look dev and heavy NPR rendering techniques.
This project drove me to explore and begin to learn Houdini, and really think about what future game productions could look like. It changed my path, and I am very thankful for that.
Tool : Procedural Tint mask Substance v0.1
Adaptive Pixelization
![]()
Feb 2015
Jan 2015
Sep 2014